
From Sketch to Garment: A Professional Guide to Apparel Realization and Manufacturing
Translating Design: From Creative Sketch to Precision Pattern
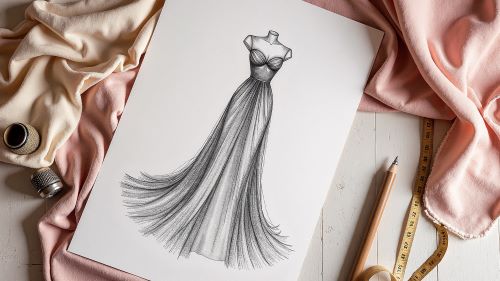
While garment making begins with a pencil and paper, true craftsmanship manifests the moment a 2D idea is converted into a 3D blueprint. Pattern making is the bridge that connects imagination to reality with scientific precision.
Step 1: Drafting the Sloper (Utilizing the Bunka-style Method)
Every piece of couture begins with a "Block" or "Sloper." The Japanese Bunka-style drafting method is globally recognized for its anatomical accuracy.
-
Key Measurement Points: Bust, Waist, Hips, and Back Neck to Waist (referencing JIS standards or GB/T 1335.1-2008).
-
Calculating Ease:
-
Woven Fabrics: +4 to 6 cm
-
Knitted Fabrics: +5 to 8 cm (adjusted based on stretch ratio).
-
-
The Golden Rule of Drafting: "The back shoulder dart must always be 1.5 cm larger than the front to secure the range of motion for the scapula" (a core theory from Bunka Fashion College).
Step 2: Integrating Design Elements (Development)
Transforming creative details into a physical structure requires structural intelligence.
-
Pleats: Convert sketched folds into calculated fabric volumes (typically requiring 200–300% of the finished width).
-
Princess Lines: Design curves to pass approximately 3.5 cm below the Bust Point (BP) to create a sophisticated 3D contour.
-
Dart Manipulation: Use the "Pivoting Method" to transfer waist darts into design seams or style lines.
Step 3: Verification and Marking (Quality Control)
Before cutting the fabric, the blueprint must be verified.
-
Notches: Place triangular snips at 5 cm intervals on curved seams to prevent shifting during sewing.
-
Grainline: Mark the grainline perpendicular to the hip line.
-
Seam Allowance: Standard is 1.0–1.5 cm, adjusted for specific finishes (e.g., narrower for tight curves).
Textile Science: The Synergy of Fabric and Notions
The choice of fabric dictates the construction method. This is the "chemistry" of apparel.
Fabric Selection (The 3 Evaluation Pillars)
Professionals judge materials based on:
-
Weight (GSM / g/m²): Directly impacts durability and structure.
-
Drape: Evaluated via the Cantilever Test to determine silhouette elegance.
-
Stretch & Kickback: A 30% stretch test is conducted to reverse-calculate required ease.
The Mechanics of Interfacing
Interfacing is the "skeleton" of the garment.
-
Tailored Jackets: Combine "Hair Canvas" for the body with "Knit Fusible Interfacing" for the lapels.
-
Structured Dresses: Use "Woven Interfacing" for waistbands and "Non-woven" for hems.
-
Sheer Fabrics: Use silk organza as an "underlining" to maintain the hand-feel while providing support.
Notions Specifications
-
Zippers: Use "Coil Zippers" for curves and "Invisible Zippers" for center back closures.
-
Buttons: A general rule for diameter is (Fabric Thickness × 2) + 3mm.
-
Thread Weights:
-
General Assembly: 60wt (approx. Tex 40)
-
Topstitching: 30wt (approx. Tex 60)
-
Production Execution: Technical Sequence (Sewing Process)
At Dalian Laisipeng Trading Co., Ltd., we bridge the gap between atelier-level detail and factory-level efficiency.
Precision Cutting Protocol
-
Layout (Marking): Align large pattern pieces parallel to the "Selvedge."
-
Cutting Tools: Use a 60mm rotary cutter for wovens to prevent edge distortion and ball-point shears for knits to protect the loops.
Sewing Engineering
-
Stitch Pitch: 2.5mm for structural seams (approx. 12 stitches per 3cm) and 3.0mm for topstitching.
-
Thread Tension: The ideal balance is achieved when the needle and bobbin threads interlock exactly in the center of the fabric thickness.
-
Presser Foot Utilization: Use "Roller or Teflon feet" for curves, "Invisible Zipper feet" for closures, and "Edge Guide feet" for topstitching.
Professional Finishing (Pressing)
The "face" of a garment is decided by the iron. Follow these temperature benchmarks:
|
Material |
Temperature |
Steam Setting |
|
Cotton |
200°C |
Max |
|
Wool |
160°C |
Medium |
|
Silk |
130°C |
Light (Pressing cloth required) |
|
Synthetic |
110°C |
Dry (No steam) |
Conclusion
By systematically practicing these 12 Critical Control Points, hobbyist sewing evolves into Precision Craftsmanship:
-
Bunka-style Sloper Accuracy
-
Scientific Ease Calculation
-
Dart Placement Optimization
-
GSM (Weight) Compatibility
-
Drape Evaluation
-
Interfacing Synergy
-
Notions Standard Selection
-
Efficient Marker Layout
-
Specialized Tool Selection
-
Stitch Tension Calibration
-
Presser Foot Specialization
-
Final Thermal Finishing
We recommend starting with a Cotton A-line Skirt. It is the perfect project to practice ease adjustment and "French Seams." The path to professional quality starts here.
[Next Steps]
What is the first "Toile" (prototype) you plan to build? If you have technical challenges regarding OEM production or specific sewing hurdles, feel free to reach out to Dalian Laisipeng Trading Co., Ltd. Let's solve your manufacturing challenges together.


